BloodHound Setup and Installation
BloodHound use Neo4j, a graph database management system designed to store, manage, and query data represented in a graph. It is a NoSQL database that uses a graph data model to represent and store data, with nodes and edges representing the data and relationships, respectively. This allows Neo4j to represent complex and interconnected data structures more intuitively and efficiently than traditional relational databases.
Neo4j is written in Java and requires a Java Virtual Machine (JVM) to run.
BloodHound can be installed on Windows, Linux, and macOS. We will need to install Java and Neo4j and then download the BloodHound GUI. We can also build the BloodHound GUI from the source, but we won't cover that step in this section. If you want to build from the source, you can read BloodHound official documentation.
We will do the installation in 3 steps:
- Install Java.
- Install Neo4j.
- Install BloodHound.
Windows Installation
We first need to download and install Java Oracle JDK 11. We need to register an account before downloading Java from their website. Once we download the installation file, we can silently install it using the following command:
Install Java Silently
PS C:\htb> .\jdk-11.0.17_windows-x64_bin.exe /s
Next, we need to install Neo4j. We can get the complete list of available versions in the Neo4j Download Center.
Unzip Neo4j
PS C:\htb> Expand-Archive .\neo4j-community-4.4.16-windows.zip .
Next, we need to install Neo4j. To install it as a service, we need to move to the .\neo4j-community-*\bin\ directory and execute the following command neo4j.bat install-service:
Install Neo4j Service
PS C:\htb> .\neo4j-community-4.4.16\bin\neo4j.bat install-service
Neo4j service installed.
Note: At this point, we may see an error about Java not being found or the wrong version of Java running. Ensure your JAVA_HOME environment variable is set to the JDK folder (example: C:\Program Files\Java\jdk-11.0.17); this is done automatically after installation. Still, if the installation fails, we must ensure everything is configured correctly.
Once the service is installed, we can start the service:
Start Service
PS C:\htb> net start neo4j
The Neo4j Graph Database - neo4j service is starting..
The Neo4j Graph Database - neo4j service was started successfully.
Configure Neo4j Database
To configure the Neo4j database, open a web browser and navigate to the Neo4j web console at

Authenticate to Neo4j in the web console with username neo4j and password neo4j, leave the database empty, and once prompted, change the password.

Download BloodHound GUI
- Download the latest version of the BloodHound GUI for Windows from https://github.com/BloodHoundAD/BloodHound/releases.

Note: We may get a warning from the Browser or the AV that the file is malicious. Ignore and allow the download.
- Unzip the folder and double-click BloodHound.exe.
- Authenticate with the credentials you set up for neo4j.

Linux Installation
The first thing we need to do is download and install Java Oracle JDK 11. We will update our apt sources to install the correct package:
Updating APT sources to install Java
# echo "deb http://httpredir.debian.org/debian stretch-backports main" | sudo tee -a /etc/apt/sources.list.d/stretch-backports.list
# sudo apt-get update
...SNIP...
With this update, if Java is not installed when we try to install Neo4j, it will automatically install it as part of the Neo4j installation. Let's add the apt sources for Neo4j installation:
Updating APT sources to install Neo4j
$ wget -O - https://debian.neo4j.com/neotechnology.gpg.key | sudo apt-key add -
$ echo 'deb https://debian.neo4j.com stable 4.4' | sudo tee -a /etc/apt/sources.list.d/neo4j.list
$ sudo apt-get update
...SNIP...
Before installing Neo4j, we need to install the apt-transport-https package with apt:
Installing required packages
$ sudo apt-get install apt-transport-https
...SNIP...
Now we can install Neo4j. Let's first list the available options and pick the latest 4.4.X version.
Installing Neo4j
$ sudo apt list -a neo4j
sudo apt list -a neo4j
Listing... Done
neo4j/stable 1:5.3.0 all [upgradable from: 1:4.4.12]
neo4j/stable 1:5.2.0 all
neo4j/stable 1:5.1.0 all
neo4j/stable 1:4.4.16 all
neo4j/stable 1:4.4.15 all
neo4j/stable 1:4.4.14 all
neo4j/stable 1:4.4.13 all
neo4j/stable,now 1:4.4.12 all [installed,upgradable to: 1:5.3.0]
neo4j/stable 1:4.4.11 all
neo4j/stable 1:4.4.10 all
neo4j/stable 1:4.4.9 all
...SNIP...
At the time of writing. The latest version is Neo4j 4.4.16, let's install that version with the following command:
Installing Neo4j 4.4.X
$ sudo apt install neo4j=1:4.4.16 -y
Reading package lists... Done
Building dependency tree... Done
Reading state information... Done
The following packages will be upgraded:
  neo4j
1 upgraded, 0 newly installed, 0 to remove, and 236 not upgraded.
Need to get 106 MB of archives.
After this operation, 1,596 kB of additional disk space will be used.
Get:1 https://debian.neo4j.com stable/4.4 amd64 neo4j all 1:4.4.16 [106 MB]
Fetched 106 MB in 2s (55.9 MB/s)
...SNIP...
Next, we need to make sure we are using Java 11. We can update which java version our operating system will use with the following command:
Change Java version to 11
$ sudo update-alternatives --config java
There are 2 choices for the alternative java (providing /usr/bin/java).

  Selection    Path                                         Priority   Status
------------------------------------------------------------
  0            /usr/lib/jvm/java-13-openjdk-amd64/bin/java   1311      auto mode
* 1            /usr/lib/jvm/java-11-openjdk-amd64/bin/java   1111      manual mode
  2            /usr/lib/jvm/java-13-openjdk-amd64/bin/java   1311      manual mode

Press <enter> to keep the current choice[*], or type selection number: 1
Note: Option 1 correspond to Java 11. The option may be different in your system.
We can start Neo4j as a console application to verify it starts up without errors:
Running Neo4j as console
$ cd /usr/bin
$ sudo ./neo4j console
Directories in use:
home:         /var/lib/neo4j
config:       /etc/neo4j
logs:         /var/log/neo4j
plugins:      /var/lib/neo4j/plugins
import:       /var/lib/neo4j/import
data:         /var/lib/neo4j/data
certificates: /var/lib/neo4j/certificates
licenses:     /var/lib/neo4j/licenses
run:          /var/lib/neo4j/run
Starting Neo4j.
2023-01-05 20:04:26.679+0000 INFO  Starting...
2023-01-05 20:04:27.369+0000 INFO  This instance is ServerId{fb3f5e13} (fb3f5e13-5dfd-49ee-b068-71ad7f5ce997)
2023-01-05 20:04:29.103+0000 INFO  ======== Neo4j 4.4.16 ========
2023-01-05 20:04:30.562+0000 INFO  Performing postInitialization step for component 'security-users' with version 3 and status CURRENT
2023-01-05 20:04:30.562+0000 INFO  Updating the initial password in component 'security-users'
2023-01-05 20:04:30.862+0000 INFO  Bolt enabled on localhost:7687.
2023-01-05 20:04:31.881+0000 INFO  Remote interface available at http://localhost:7474/
2023-01-05 20:04:31.887+0000 INFO  id: 613990AF56F6A7BDDA8F79A02F0ACED758E04015C5B0809590687C401C98A4BB
2023-01-05 20:04:31.887+0000 INFO  name: system
2023-01-05 20:04:31.888+0000 INFO  creationDate: 2022-12-12T15:59:25.716Z
2023-01-05 20:04:31.888+0000 INFO  Started.
To start and stop the service, we can use the following commands:
Start Neo4j
$ sudo systemctl start neo4j
Stop Neo4j
$ sudo systemctl stop neo4j
Note: It is very common for people to host Neo4j on a Linux system but use the BloodHound GUI on a different system. Neo4j, by default, only allows local connections. To allow remote connections, open the neo4j configuration file located at /etc/neo4j/neo4j.conf and edit this line:

#dbms.default_listen_address=0.0.0.0

Remove the # character to uncomment the line. Save the file, then start neo4j up again
Configure Neo4j Database
To configure the Neo4j database, we will do the same steps we did on Windows:
Open a web browser and navigate to the Neo4j web console at http://localhost:7474/:
Change Neo4j default credentials. Authenticate to neo4j in the web console with username neo4j and password neo4j, leave the database empty, and once prompted, change the password.
Download BloodHound GUI
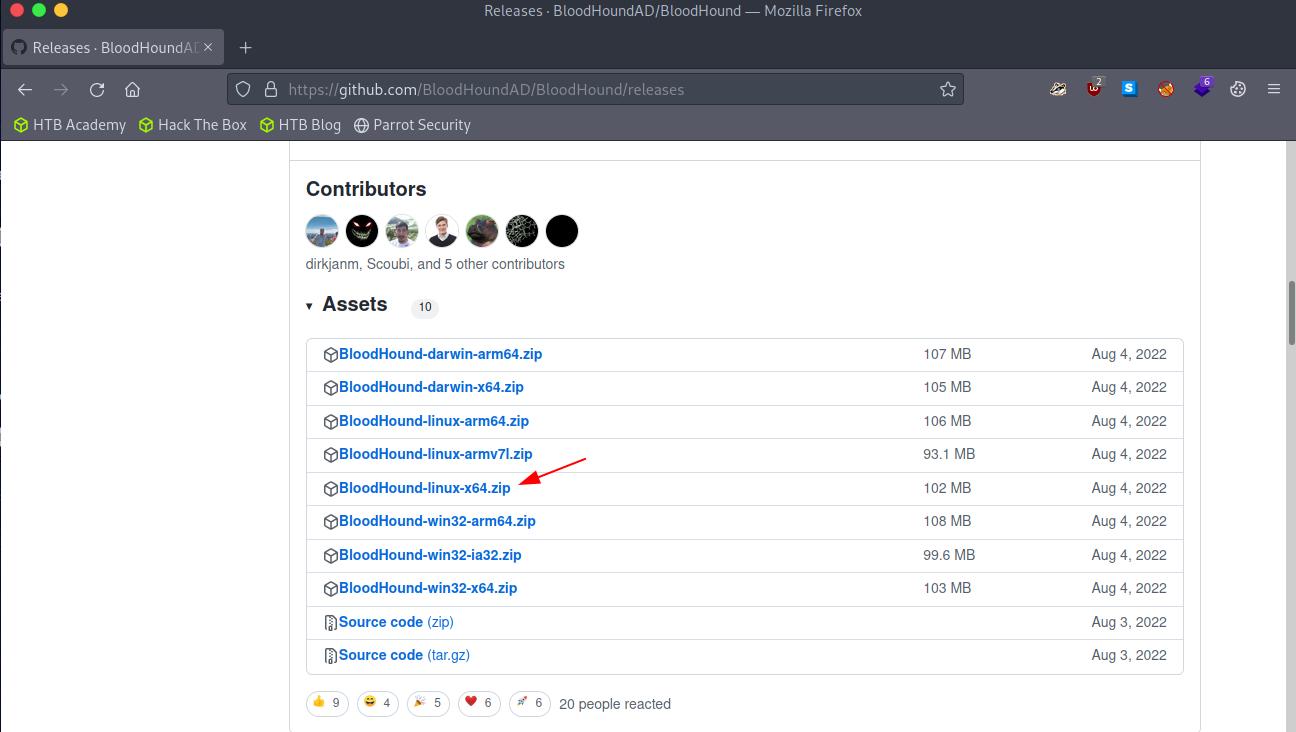
- Download the latest version of the BloodHound GUI for Linux from https://github.com/BloodHoundAD/BloodHound/releases.
- Unzip the folder, then run BloodHound with the --no-sandbox flag:
Unzip BloodHound
$ unzip BloodHound-linux-x64.zip
Archive:  BloodHound-linux-x64.zip
   creating: BloodHound-linux-x64/
  inflating: BloodHound-linux-x64/BloodHound
  ...SNIP...
Execute BloodHound
$ cd BloodHound-linux-x64/
$ ./BloodHound --no-sandbox
- Authenticate with the credentials you set up for neo4j.
MacOS Install
To install BloodHound in MacOS, we can follow the steps provided in BloodHound official documentation.
Updating BloodHound requirements (Linux)
In case we have already installed BloodHound, and we need to update it to support the latest version, we can update Neo4j and Java with the following commands:
Update Neo4j
$ wget -O - https://debian.neo4j.com/neotechnology.gpg.key | sudo apt-key add -
$ echo 'deb https://debian.neo4j.com stable 4.4' | sudo tee -a /etc/apt/sources.list.d/neo4j.list
$ sudo apt-get update
...SNIP...
Install Neo4j 4.4.X
$ sudo apt install neo4j=1:4.4.16 -y
Reading package lists... Done
Building dependency tree... Done
Reading state information... Done
The following packages will be upgraded:
  neo4j
1 upgraded, 0 newly installed, 0 to remove, and 236 not upgraded.
Need to get 106 MB of archives.
After this operation, 1,596 kB of additional disk space will be used.
Get:1 https://debian.neo4j.com stable/4.4 amd64 neo4j all 1:4.4.16 [106 MB]
Fetched 106 MB in 2s (55.9 MB/s)
...SNIP...
Note: Make sure to change the Java version to 11 as mention in the installation steps.
Recovering Neo4j Credentials
In case we can't access the Neo4j database with the default credentials, we can follow the next steps to reset the default credentials:
- Stop neo4j if it is running
$ sudo systemctl stop neo4j
-
edit
/etc/neo4j/neo4j.conf, and uncommentdbms.security.auth_enabled=false. -
Start neo4j console:
$ sudo neo4j console
Directories in use:
home:         /var/lib/neo4j
config:       /etc/neo4j
logs:         /var/log/neo4j
plugins:      /var/lib/neo4j/plugins
import:       /var/lib/neo4j/import
data:         /var/lib/neo4j/data
certificates: /var/lib/neo4j/certificates
licenses:     /var/lib/neo4j/licenses
run:          /var/lib/neo4j/run
Starting Neo4j.
2023-01-05 20:49:46.214+0000 INFO  Starting
...SNIP...
-
Navigate to http://localhost:7474/ and click Connect to log in without credentials.
-
Set a new password for the
neo4jaccount with the following query:ALTER USER neo4j SET PASSWORD 'Password123';

-
Stop neo4j service.
-
Edit
/etc/neo4j/neo4j.conf, and comment out thedbms.security.auth_enabled=false. -
Start Neo4j and use the new password.
In the following sections, we will start working with BloodHound and using SharpHound to collect data from the Active Directory.